Making Models with Mantra
Mantra models allow you to take a model in an framework such as TensorFlow or PyTorch, and with a few modifications, allows them to be easily trained, deployed, evaluated and more. In these docs we are going to see how we make a model package.
🤖 Make a Model
Go to the root of your project. To make a new model we can use the makemodel command:
$ mantra makemodel my_model
If we intend to use a particular deep learning framework, we can reference a template:
$ mantra makemodel my_model --template tensorflow
$ mantra makemodel my_model --template keras
$ mantra makemodel my_model --template pytorch
Our new model folder will be located at myproject/models/my_model. Inside:
__init__.py
 default.jpg
model.py
notebook.ipynb
README.md
model.pycontains your core model logicnotebook.ipynbis a notebook which you can use for prototypingREADME.mdis where you can describe the model (useful for sharing the model with others)
Let’s have a look at the model.py file and see what the template contains:
from mantraml.models import MantraModel

class MyModel(MantraModel):
    model_name = "My Model"
    model_image = "default.jpg"
    model_notebook = 'notebook.ipynb'
    model_tags = ['new']

    def __init__(self, data=None, task=None, **kwargs):
        self.data = data
        self.task = task

    def run(self):
        return

    def predict(self, X):
        return
The first thing we observe is that we inherit from MantraModel. This is a simple step - if you have existing machine learning code in a class then you can just inherit from MantraModel to gain access to most of the Mantra integration.
The second thing we observe is we just need to pass in a data and task argument when initializing the class - this is what allows Mantra models to be composable with different datasets and evaluation criteria.
The third thing we observe is the run and predict methods. All you need to do is to trigger your training code from the run method. When Mantra trains the model, it will call this method first and the rest is history. For optional evaluation, you just need to write a predict method.
This is the core design pattern of Mantra models.
Now let’s see some examples for each framework: Keras, Base TensorFlow and PyTorch.
Model Building in Keras

Here is an example of a deep CNN using Keras:
import tensorflow
from tensorflow.keras.models import Sequential
from tensorflow.keras.layers import Dense, Dropout, Activation, Flatten
from tensorflow.keras.layers import Conv2D, MaxPooling2D

from mantraml.models import MantraModel
from mantraml.models.keras.callbacks import TensorBoard, StoreTrial, EvaluateTask, ModelCheckpoint


class DeepCNN(MantraModel):
    model_name = "Deep Convolutional Model"
    model_image = "default.jpg"
    model_notebook = 'notebook.ipynb'
    model_tags = ['cnn', 'classification']

    def __init__(self, data=None, task=None, **kwargs):
        self.data = data
        self.task = task

        self.dropout = kwargs.get('dropout', 0.25)
        self.optimizer = kwargs.get('optimizer', 'adam')
        self.loss = kwargs.get('loss', 'categorical_crossentropy')
        self.metrics = kwargs.get('metrics', ['accuracy'])

        if self.task:
          self.X = self.task.X_train
          self.y = self.task.y_train
        else:
          self.X = self.data.X
          self.y = self.data.y

    def run(self):
        num_classes = self.data.X.shape[1]

        model = Sequential()
        model.add(Conv2D(32, (3, 3), padding='same', input_shape=self.data.X.shape[1:]))
        model.add(Activation('relu'))
        model.add(Conv2D(32, (3, 3)))
        model.add(Activation('relu'))
        model.add(MaxPooling2D(pool_size=(2, 2)))
        model.add(Dropout(self.dropout))

        model.add(Conv2D(64, (3, 3), padding='same'))
        model.add(Activation('relu'))
        model.add(Conv2D(64, (3, 3)))
        model.add(Activation('relu'))
        model.add(MaxPooling2D(pool_size=(2, 2)))
        model.add(Dropout(self.dropout))

        model.add(Flatten())
        model.add(Dense(512))
        model.add(Activation('relu'))
        model.add(Dropout(self.dropout))
        model.add(Dense(num_classes))
        model.add(Activation('softmax'))

        model.compile(loss=self.loss, optimizer=self.optimizer, metrics=self.metrics)

        self.model = model

        tb_callback = TensorBoard(mantra_model=self, write_graph=True, write_images=True)
        exp_callback = StoreTrial(mantra_model=self)
        eval_callback = EvaluateTask(mantra_model=self)
        checkpoint_callback = ModelCheckpoint(mantra_model=self)

        callbacks = [tb_callback, eval_callback, checkpoint_callback, exp_callback]

        self.model.fit(self.X, self.y, epochs=self.n_epochs, batch_size=self.n_batch,
            callbacks=callbacks)

    def predict(self, X):
        return self.model.predict(X)
Let’s briefly analyse this code:
- We’ve inherited from
MantraModel - We’ve specified our data
self.Xandself.y - We’ve written our model logic in
run
There’s one final thing to note. Keras reports results to you through callbacks. To get nice results reported to us through the Mantra UI, we simply need to add some or all of the following callbacks:
tb_callback = TensorBoard(mantra_model=self, write_graph=True, write_images=True)
exp_callback = StoreTrial(mantra_model=self)
eval_callback = EvaluateTask(mantra_model=self)
checkpoint_callback = ModelCheckpoint(mantra_model=self)
This will configure things so your logs, media, and weights are managed and versioned correctly; and that you can monitor and evaluate results through the UI.
And that’s it, your model is Mantra ready!
For more more Keras model examples, check out the Mantra examples repository.
Model Building in TensorFlow

The class structure is the same as the Keras example. But now we use the following callbacks:
from mantraml.models.tensorflow.summary import FileWriter
from mantraml.models.tensorflow.callbacks import ModelCheckpoint, EvaluateTask, StoreTrial, SavePlot
To configure your TensorFlow code for Mantra, use the mantra FileWriter instead of the TensorFlow FileWriter. For example:
self.writer = FileWriter(mantra_model=self)
Then at the end of each epoch of training, use the following callbacks:
ModelCheckpoint(mantra_model=self, session=self.session)
if self.task:
    EvaluateTask(mantra_model=self)
StoreTrial(mantra_model=self, epoch=epoch)
Just as with Keras callbacks, this will configure things so your logs, media, and weights are managed and versioned correctly; and that you can monitor and evaluate results through the UI.
For TensorFlow model examples, check out the Mantra examples repository.
Model Building in PyTorch

The class structure is the same as the previous examples. But now we use the following callbacks:
from mantraml.models.pytorch.summary import SummaryWriter
from mantraml.models.pytorch.callbacks import ModelCheckpoint, EvaluateTask, StoreTrial, SavePlot
Mantra works with TensorBoardX for PyTorch. Use the mantra SummaryWriter instead of the TensorBoardX SummaryWriter:
self.writer = SummaryWriter(mantra_model=self)
Then at the end of each epoch of training, use the following callbacks:
ModelCheckpoint(mantra_model=self, session=self.session)
if self.task:
    EvaluateTask(mantra_model=self)
StoreTrial(mantra_model=self, epoch=epoch)
For PyTorch model examples, check out the Mantra examples repository.
🖼 Visualizing Your Model Projects
Load up the UI and click on a model:
$ mantra ui
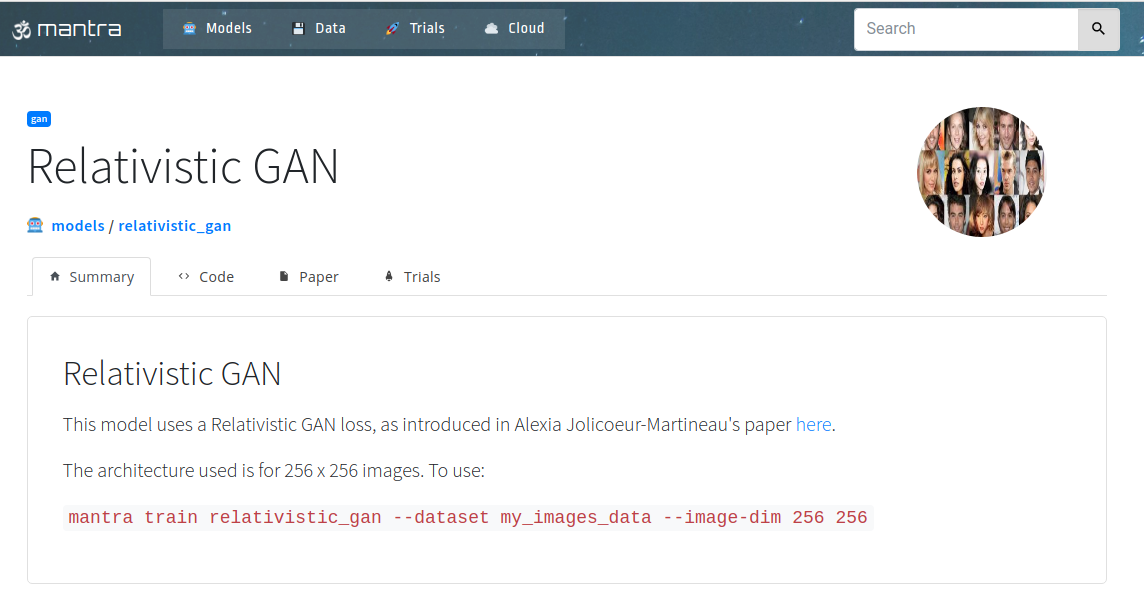
In order to customise how the UI looks for your model you can add metadata to your model classes:
class DeepCNN(MantraModel):

    # The Name of the Model
    model_name = "Relativistic GAN"

    # The Model Image
    model_image = "default.jpg"

    # Link to a Notebook
    model_notebook = 'notebook.ipynb'

    # Tags for the Model
    model_tags = ['cnn', 'classification']

    # ArXiv Link
    model_arxiv_id = '1807.00734'

    # Custom Paper PDF (instead of an ArXiv PDF)
    model_pdf = 'my_paper.pdf'
Then when you share the model with your collaborators, they won’t just get code - they’ll get a whole project they can visualize and interact with: including notebooks, the paper the model was based on, and more!
✨ Magic Hyperparameters
Write some custom hyperparameters in your __init__ function:
def __init__(self, data=None, task=None, **kwargs):
  self.dropout = kwargs.get('dropout', 0.25)
  self.optimizer = kwargs.get('my_optimizer', 'adam')

  ...
When you train you can automatically reference these hyperparmeters without writing command parser code, i.e. this works out of the box:
$ mantra train my_model --dataset my_dat --dropout 0.5 --my-optimizer 'adam'
Note that there are two core hyperparameters that are supported by default: self.batch_size and self.epochs. These can be adjusted through the command line:
$ mantra train my_model --dataset my_dat --epochs 100 --batch-size 32